User:Vergir: Difference between revisionsGive feedback
Split the flat wear section into the tint-behind and edge-ramp variants (with help from vergir-bot LLM) |
Add section 2c for the soft wear variant (with help from vergir-bot LLM) |
||
| Line 11: | Line 11: | ||
Six configurations of the same ten items. Each masked layer costs the GPU a separate render pass per card, and the texture's <code>mix-blend-mode: multiply</code> costs a backdrop read, so every section below removes one or more of those. | Six configurations of the same ten items. Each masked layer costs the GPU a separate render pass per card, and the texture's <code>mix-blend-mode: multiply</code> costs a backdrop read, so every section below removes one or more of those. | ||
Sections 2, 2b and 2c are three ways of dropping the wear mask; they are visual candidates, not separate things to measure. Once one is chosen the rest come out and the survivor gets folded into a single low-graphics configuration to profile as a whole. | |||
== 1. Baseline == | == 1. Baseline == | ||
| Line 19: | Line 19: | ||
== 2. Flat wear, tint behind the artwork == | == 2. Flat wear, tint behind the artwork == | ||
<code>wearMask=no</code> — the tint drops behind the icon and the name instead of covering them, so only the card stock is tinted | <code>wearMask=no</code> — the tint drops behind the icon and the name instead of covering them, so only the card stock is tinted. | ||
{{ItemBox|itemName=Active Reload|wearMask=no}} {{ItemBox|itemName=Alchemical Fire|wearMask=no}} {{ItemBox|itemName=Arctic Blast|wearMask=no}} {{ItemBox|itemName=Berserker|wearMask=no}} {{ItemBox|itemName=Bullet Armor|wearMask=no}} {{ItemBox|itemName=Cheat Death|wearMask=no}} {{ItemBox|itemName=Colossus|wearMask=no}} {{ItemBox|itemName=Crippling Headshot|wearMask=no}} {{ItemBox|itemName=Divine Barrier|wearMask=no}} {{ItemBox|itemName=Echo Shard|wearMask=no}} | {{ItemBox|itemName=Active Reload|wearMask=no}} {{ItemBox|itemName=Alchemical Fire|wearMask=no}} {{ItemBox|itemName=Arctic Blast|wearMask=no}} {{ItemBox|itemName=Berserker|wearMask=no}} {{ItemBox|itemName=Bullet Armor|wearMask=no}} {{ItemBox|itemName=Cheat Death|wearMask=no}} {{ItemBox|itemName=Colossus|wearMask=no}} {{ItemBox|itemName=Crippling Headshot|wearMask=no}} {{ItemBox|itemName=Divine Barrier|wearMask=no}} {{ItemBox|itemName=Echo Shard|wearMask=no}} | ||
== 2b. Flat wear, ramped from the edges == | == 2b. Flat wear, ramped from the edges == | ||
<code>wearMask=ramp</code> — tint stays on top but fades out toward the centre, gathering at the edges where wear belongs | <code>wearMask=ramp</code> — tint stays on top but fades out toward the centre, gathering at the edges where wear belongs. | ||
{{ItemBox|itemName=Active Reload|wearMask=ramp}} {{ItemBox|itemName=Alchemical Fire|wearMask=ramp}} {{ItemBox|itemName=Arctic Blast|wearMask=ramp}} {{ItemBox|itemName=Berserker|wearMask=ramp}} {{ItemBox|itemName=Bullet Armor|wearMask=ramp}} {{ItemBox|itemName=Cheat Death|wearMask=ramp}} {{ItemBox|itemName=Colossus|wearMask=ramp}} {{ItemBox|itemName=Crippling Headshot|wearMask=ramp}} {{ItemBox|itemName=Divine Barrier|wearMask=ramp}} {{ItemBox|itemName=Echo Shard|wearMask=ramp}} | {{ItemBox|itemName=Active Reload|wearMask=ramp}} {{ItemBox|itemName=Alchemical Fire|wearMask=ramp}} {{ItemBox|itemName=Arctic Blast|wearMask=ramp}} {{ItemBox|itemName=Berserker|wearMask=ramp}} {{ItemBox|itemName=Bullet Armor|wearMask=ramp}} {{ItemBox|itemName=Cheat Death|wearMask=ramp}} {{ItemBox|itemName=Colossus|wearMask=ramp}} {{ItemBox|itemName=Crippling Headshot|wearMask=ramp}} {{ItemBox|itemName=Divine Barrier|wearMask=ramp}} {{ItemBox|itemName=Echo Shard|wearMask=ramp}} | ||
== 2c. Soft wear, uniform tint with the name lifted == | |||
<code>wearMask=soft</code> — tint stays on top and uniform so the artwork keeps its unifying wash, but at 0.35 opacity, with the name raised clear of it. The 0.35 is a first guess and wants tuning. | |||
{{ItemBox|itemName=Active Reload|wearMask=soft}} {{ItemBox|itemName=Alchemical Fire|wearMask=soft}} {{ItemBox|itemName=Arctic Blast|wearMask=soft}} {{ItemBox|itemName=Berserker|wearMask=soft}} {{ItemBox|itemName=Bullet Armor|wearMask=soft}} {{ItemBox|itemName=Cheat Death|wearMask=soft}} {{ItemBox|itemName=Colossus|wearMask=soft}} {{ItemBox|itemName=Crippling Headshot|wearMask=soft}} {{ItemBox|itemName=Divine Barrier|wearMask=soft}} {{ItemBox|itemName=Echo Shard|wearMask=soft}} | |||
== 3. No icon mask == | == 3. No icon mask == | ||
| Line 32: | Line 37: | ||
{{ItemBox|itemName=Active Reload|iconMask=no}} {{ItemBox|itemName=Alchemical Fire|iconMask=no}} {{ItemBox|itemName=Arctic Blast|iconMask=no}} {{ItemBox|itemName=Berserker|iconMask=no}} {{ItemBox|itemName=Bullet Armor|iconMask=no}} {{ItemBox|itemName=Cheat Death|iconMask=no}} {{ItemBox|itemName=Colossus|iconMask=no}} {{ItemBox|itemName=Crippling Headshot|iconMask=no}} {{ItemBox|itemName=Divine Barrier|iconMask=no}} {{ItemBox|itemName=Echo Shard|iconMask=no}} | {{ItemBox|itemName=Active Reload|iconMask=no}} {{ItemBox|itemName=Alchemical Fire|iconMask=no}} {{ItemBox|itemName=Arctic Blast|iconMask=no}} {{ItemBox|itemName=Berserker|iconMask=no}} {{ItemBox|itemName=Bullet Armor|iconMask=no}} {{ItemBox|itemName=Cheat Death|iconMask=no}} {{ItemBox|itemName=Colossus|iconMask=no}} {{ItemBox|itemName=Crippling Headshot|iconMask=no}} {{ItemBox|itemName=Divine Barrier|iconMask=no}} {{ItemBox|itemName=Echo Shard|iconMask=no}} | ||
== 5. No texture == | == 5. No texture == | ||
Revision as of 12:25, 24 July 2026
Holliday
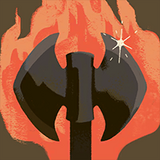
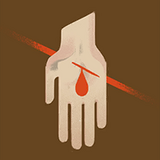
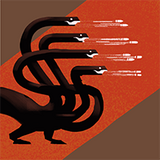
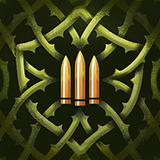
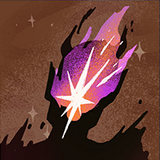
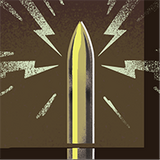
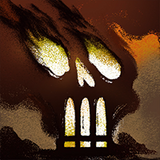
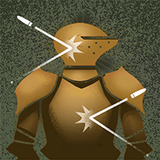
In Street Brawl, every hero draws items from a shared pool, but some items are weighted to appear more often for a given hero and others less often. For each tier below, that tier's items are grouped by how likely they are to be offered to Holliday: High, Average, or Low chance.














































Vindicta (has counter items)
In Street Brawl, every hero draws items from a shared pool, but some items are weighted to appear more often for a given hero and others less often. For each tier below, that tier's items are grouped by how likely they are to be offered to Vindicta: High, Average, or Low chance.
When facing Vindicta in Street Brawl, the enemy team is more likely to be offered these items as counters.
ItemBox layer profiling
Six configurations of the same ten items. Each masked layer costs the GPU a separate render pass per card, and the texture's mix-blend-mode: multiply costs a backdrop read, so every section below removes one or more of those.
Sections 2, 2b and 2c are three ways of dropping the wear mask; they are visual candidates, not separate things to measure. Once one is chosen the rest come out and the survivor gets folded into a single low-graphics configuration to profile as a whole.
1. Baseline
Wear mask, icon mask and texture blend all present, as on every other page.

2. Flat wear, tint behind the artwork
wearMask=no — the tint drops behind the icon and the name instead of covering them, so only the card stock is tinted.
2b. Flat wear, ramped from the edges
wearMask=ramp — tint stays on top but fades out toward the centre, gathering at the edges where wear belongs.
2c. Soft wear, uniform tint with the name lifted
wearMask=soft — tint stays on top and uniform so the artwork keeps its unifying wash, but at 0.35 opacity, with the name raised clear of it. The 0.35 is a first guess and wants tuning.
3. No icon mask
iconMask=no — icons render as plain squares. One fewer render pass per card.
5. No texture
texture=no — masks intact, blend dropped. One fewer backdrop read per card.
6. Everything off
The floor. Whatever lag remains here is not coming from masks or blending.