The Cursed Apple: Difference between revisionsGive feedback
None of the new heroes refer to Green as Park, I don't think anyone refers to Green as Park |
→Layout: Corrected to current boxes and golden statues spawn time |
||
| (38 intermediate revisions by 17 users not shown) | |||
| Line 1: | Line 1: | ||
{{Quotation|The [[Shopkeeper]]|Welcome to New York! Need a gun?}}[[File:Map.png|right|frameless|300x300px]] | |||
'''The Cursed Apple''' or '''"The Map"''' is the default location where matches take place in ''[[Deadlock]]''. It is a small segment of the game's version of Midtown and Lower Manhattan in New York City, in which the [[Heroes]] fight to complete [[The Ritual]] and summon their respective [[Patron]]. Players can navigate with a [[Minimap]]. | '''The Cursed Apple''' or '''"The Map"''' is the default location where matches take place in ''[[Deadlock]]''. It is a small segment of the game's version of Midtown and Lower Manhattan in New York City, in which the [[Heroes]] fight to complete [[The Ritual]] and summon their respective [[Patron]]. Players can navigate with a [[Minimap]]. | ||
| Line 8: | Line 8: | ||
[[File:Juke Room In-game.png|thumb|263x263px|A Juke Room, with a shadow figure in its doorway.]] | [[File:Juke Room In-game.png|thumb|263x263px|A Juke Room, with a shadow figure in its doorway.]] | ||
=== Layout === | === Layout === | ||
The map is divided into three distinct lanes: York | The map is divided into three distinct lanes: '''York''' (Yellow Lane), '''Broadway''' (Blue Lane) and '''Park''' (Green Lane), also referred to as '''Greenwich'''. Outside of these lanes are a series of tunnels, alleyways, and buildings that sometimes contain [[Golden Statue]]s, crates, and [[Neutral]]s. In each lane, a [[Ziplines|Zipline]] extends from both bases directly overhead with each having the color of the corresponding lane. [[The Hidden King|The Hidden King's]] side of the map has mostly worn down red brick buildings, while [[The Archmother|the Archmother's]] side has mostly upper class white brick buildings. | ||
Throughout the map, players can find destructible Boxes and Golden Statues. Boxes have a 60% chance to drop [[souls]] upon being destroyed, and Golden Statues have a 50% chance to drop permanent stat bonuses, such as [[Spirit Power]] or [[Weapon Damage]]. They spawn | Throughout the map, players can find destructible Boxes and Golden Statues. Boxes have a 60% chance to drop [[souls]] upon being destroyed, and Golden Statues have a 50% chance to drop permanent stat bonuses, such as [[Spirit Power]] or [[Weapon Damage]]. They spawn 3 minutes into the game (except mid-boxes, see [[The Cursed Apple#10:00|Map Timings and Events : 10min]]) and will respawn 3 minutes after being destroyed. | ||
Outside of the lanes is an area of the map called the jungle, which is home to the | Outside of the lanes is an area of the map called the jungle, which is home to the [[Neutral]] camps. Neutrals are alien-like entities that appear in groups and will attack when provoked. They come in three different sizes: small, medium and large, and drop more souls the larger they are. Being neutral units, both teams can attack the same neutral camps, and they will be aggressive to their attackers no matter which team they are on. | ||
=== Respawn Room === | |||
At the rear of each team's base sits the Respawn Room, where heroes [[Death|respawn]] after being killed. It also houses the team's [[The Curiosity Shop|Curiosity Shop]] and a [[Souls#Soul Well|Soul Well]], which activates 3 minutes into the match. While inside the room, allied heroes restore {{DataProp|Convar|citadel_player_regen_zone_bonus_pct}}% of their maximum [[Health|health]] plus {{DataProp|Convar|citadel_player_regen_zone_bonus_base}} health each second. Enemy heroes who enter are targeted by four turrets positioned around the room. | |||
=== Juke Rooms === | === Juke Rooms === | ||
| Line 19: | Line 23: | ||
In each lane on either team's side, there are a series of powerful defensive structures that must be destroyed in order to reach the enemy base. The first is the [[Guardian]], followed by the [[Walker]] and finally a pair of weaker [[Guardian#Base Guardian|Base Guardians]]. In each team's base are two [[Shrine]]s, which must be destroyed in order to attack the main objective: the [[Patron]]. The Patron has two phases, and will shift to the second one after the first phase has been defeated. Destroying the now weakened Patron is the condition for winning a match. | In each lane on either team's side, there are a series of powerful defensive structures that must be destroyed in order to reach the enemy base. The first is the [[Guardian]], followed by the [[Walker]] and finally a pair of weaker [[Guardian#Base Guardian|Base Guardians]]. In each team's base are two [[Shrine]]s, which must be destroyed in order to attack the main objective: the [[Patron]]. The Patron has two phases, and will shift to the second one after the first phase has been defeated. Destroying the now weakened Patron is the condition for winning a match. | ||
In the very middle of the map, in the underground sewer, is a second major objective known as the [[Mid-Boss]]. It is a large alien creature similar to the | When an objective is destroyed, the bounty is split between the player who landed the killing blow and nearby allies. {{#invoke:GenericData|get_objective_param|NearPlayerSplitPct}}% of the bounty is split among nearby heroes, while the remaining {{#expr:100-{{#invoke:GenericData|get_objective_param|NearPlayerSplitPct}}}}% is distributed team-wide. | ||
In the very middle of the map, in the underground sewer, is a second major objective known as the [[Mid-Boss]]. It is a large alien creature similar to the Neutrals, possessing a very large health pool, a constantly regenerating shield and a highly dangerous laser beam. After being slain, it will spawn a [[Rejuvenator]] Crystal that can be claimed by either team. The claimer's team will be bestowed with the Rejuvenation Credit buff, granting them special effects. | |||
=== Player Visibility === | === Player Visibility === | ||
| Line 68: | Line 74: | ||
|[[Soul Urn]] | |[[Soul Urn]] | ||
|10 minutes | |10 minutes | ||
( | (12.5s descent) | ||
|Every 5:00 ( | |Every 5:00 (10, 15, 20...) | ||
|1 | |1 | ||
|- | |- | ||
| Line 80: | Line 86: | ||
|- | |- | ||
! colspan="5" |Respawn Time begins when Camp/Boss is cleared: | ! colspan="5" |Respawn Time begins when Camp/Boss is cleared: | ||
|- | |||
|[[File:MidBossIcon.png|64x64px|center]] | |||
|[[Mid-Boss]] | |||
| - | |||
|7/6/5 minutes* | |||
|1 | |||
|- | |- | ||
| | | | ||
[[File:MapEasyCampIcon.png|64x64px|center]] | [[File:MapEasyCampIcon.png|64x64px|center]] | ||
|[[ | |[[Neutral#Small Camps|Easy Camp]] | ||
|{{#expr:{{NpcData|neutral_trooper_weak|InitialSpawnDelay}}/60}}:00 minutes | |{{#expr:{{NpcData|neutral_trooper_weak|InitialSpawnDelay}}/60}}:00 minutes | ||
|{{#expr:floor({{NpcData|neutral_trooper_weak|SpawnInterval}}/60)}}:{{#ifexpr:({{NpcData|neutral_trooper_weak|SpawnInterval}} mod 60) < 10|0}}{{#expr:{{NpcData|neutral_trooper_weak|SpawnInterval}} mod 60}} minutes | |{{#expr:floor({{NpcData|neutral_trooper_weak|SpawnInterval}}/60)}}:{{#ifexpr:({{NpcData|neutral_trooper_weak|SpawnInterval}} mod 60) < 10|0}}{{#expr:{{NpcData|neutral_trooper_weak|SpawnInterval}} mod 60}} minutes | ||
| Line 90: | Line 102: | ||
| | | | ||
[[File:MapMediumCampIcon.png|64x64px|center]] | [[File:MapMediumCampIcon.png|64x64px|center]] | ||
|[[ | |[[Neutral#Medium Camps|Medium Camp]] | ||
|{{#expr:{{NpcData|neutral_trooper_normal|InitialSpawnDelay}}/60}}:00 minutes | |{{#expr:{{NpcData|neutral_trooper_normal|InitialSpawnDelay}}/60}}:00 minutes | ||
|{{#expr:floor({{NpcData|neutral_trooper_normal|SpawnInterval}}/60)}}:{{#ifexpr:({{NpcData|neutral_trooper_normal|SpawnInterval}} mod 60) < 10|0}}{{#expr:{{NpcData|neutral_trooper_normal|SpawnInterval}} mod 60}} minutes | |{{#expr:floor({{NpcData|neutral_trooper_normal|SpawnInterval}}/60)}}:{{#ifexpr:({{NpcData|neutral_trooper_normal|SpawnInterval}} mod 60) < 10|0}}{{#expr:{{NpcData|neutral_trooper_normal|SpawnInterval}} mod 60}} minutes | ||
| Line 97: | Line 109: | ||
| | | | ||
[[File:MapHardCampIcon.png|64x64px|center]] | [[File:MapHardCampIcon.png|64x64px|center]] | ||
|[[ | |[[Neutral#Large Camps|Hard Camp]] | ||
|{{#expr:{{NpcData|neutral_trooper_strong|InitialSpawnDelay}}/60}}:00 minutes | |{{#expr:{{NpcData|neutral_trooper_strong|InitialSpawnDelay}}/60}}:00 minutes | ||
|{{#expr:floor({{NpcData|neutral_trooper_strong|SpawnInterval}}/60)}}:{{#ifexpr:({{NpcData|neutral_trooper_strong|SpawnInterval}} mod 60) < 10|0}}{{#expr:{{NpcData|neutral_trooper_strong|SpawnInterval}} mod 60}} minutes | |{{#expr:floor({{NpcData|neutral_trooper_strong|SpawnInterval}}/60)}}:{{#ifexpr:({{NpcData|neutral_trooper_strong|SpawnInterval}} mod 60) < 10|0}}{{#expr:{{NpcData|neutral_trooper_strong|SpawnInterval}} mod 60}} minutes | ||
| Line 109: | Line 121: | ||
|{{#expr:{{NpcData|neutral_sinners_sacrifice|SpawnInterval}}/60}} minutes | |{{#expr:{{NpcData|neutral_sinners_sacrifice|SpawnInterval}}/60}} minutes | ||
|12 (in 10 locations) | |12 (in 10 locations) | ||
|} | |} | ||
<nowiki>*</nowiki> Mid-Boss respawn time decreases after each death, with a minimum time of 5 minutes. | <nowiki>*</nowiki> Mid-Boss respawn time decreases after each death, with a minimum time of 5 minutes. | ||
== Map Timings and Events == | == Map Timings and Events == | ||
[[ | |||
=== 0:00 === | |||
* '''[[Mid-Boss]]''' | |||
** '''Buff Granted:''' 3 [[Rejuvenator]] credits for the team (1 per heavy melee). Heals the player who punches the first time to 100% health. | |||
** '''Effect:''' Resurrects a player who dies after 3s, consuming 1 credit. | |||
** '''Respawn Time:''' 7/6/5 minutes* after being defeated, decreasing with each respawn. | |||
[[File:Midtown0min.png|alt=Image of the Deadlock minimap as it appears at 0:00 with no units on it. Initial map state.|thumb|240x240px|The map at 0 minutes.]] | [[File:Midtown0min.png|alt=Image of the Deadlock minimap as it appears at 0:00 with no units on it. Initial map state.|thumb|240x240px|The map at 0 minutes.]] | ||
| Line 126: | Line 138: | ||
=== 2:00 === | === 2:00 === | ||
* '''Easy [[ | |||
** '''Respawn Time:''' {{#expr:floor({{NpcData|neutral_trooper_weak|SpawnInterval}}/60)}}:{{#ifexpr:({{NpcData|neutral_trooper_weak|SpawnInterval}} mod 60) < 10|0}}{{#expr:{{NpcData|neutral_trooper_weak|SpawnInterval}} mod 60}} minutes after all | * '''Easy [[Neutral]] camps''' | ||
** '''Respawn Time:''' {{#expr:floor({{NpcData|neutral_trooper_weak|SpawnInterval}}/60)}}:{{#ifexpr:({{NpcData|neutral_trooper_weak|SpawnInterval}} mod 60) < 10|0}}{{#expr:{{NpcData|neutral_trooper_weak|SpawnInterval}} mod 60}} minutes after all Neutrals in camp are defeated. | |||
** '''Count:''' 4 | ** '''Count:''' 4 | ||
* '''[[ | |||
=== 3:00 === | |||
* '''Soul Well | |||
** Soul Wells located in the respawn room for each team start emitting souls. | |||
* '''[[Crates]]''' | |||
** '''Respawn Time:''' 3 minutes after being broken. | ** '''Respawn Time:''' 3 minutes after being broken. | ||
** '''Drops:''' [[Souls#Unsecured Souls | Unsecured Souls]] (50-100 Souls on average, scales with game time). | ** '''Drops:''' [[Souls#Unsecured Souls | Unsecured Souls]] (50-100 Souls on average, scales with game time). | ||
** '''Usage:''' | ** '''Usage:''' | ||
*** Unsecured Souls may be spent in the shop, but are spent ''after'' Secured Souls. | *** Unsecured Souls may be spent in the shop, but are spent ''after'' Secured Souls. | ||
*** If the player | *** If the player dies with Unsecured Souls, they appear on the ground where they died. Picking up the Souls grants the Unsecured Souls. | ||
*** | *** Neutrals also drop Unsecured Souls. | ||
* '''[[Golden Statue|Golden Statues]] (Tier 1)''' | * '''[[Golden Statue|Golden Statues]] (Tier 1)''' | ||
** '''Respawn Time:''' 3 minutes after being broken. | ** '''Respawn Time:''' 3 minutes after being broken. | ||
| Line 142: | Line 159: | ||
*** +1.5% Fire Rate | *** +1.5% Fire Rate | ||
*** +3% Ammo Capacity | *** +3% Ammo Capacity | ||
*** +0. | *** +0.5% Cooldown Reduction | ||
*** +3% Weapon Damage | *** +3% Weapon Damage | ||
*** +15 Health | *** +15 Health | ||
*** +2 Spirit | *** +2 Spirit | ||
* '''Note:''' The boxes and statues in the room above [[Mid-Boss]] only spawn | * '''Note:''' The boxes and statues in the room above [[Mid-Boss]] only spawn at 10:00. | ||
[[File:Midtown6min.png|alt=Image of the Deadlock minimap as it appears at | [[File:Midtown6min.png|alt=Image of the Deadlock minimap as it appears at 5:00 with no units on it. Has the icons for 6 small camps and 26 medium camps added on top of the initial map state.|thumb|240x240px|The map at 5 minutes.]] | ||
=== 5:00 === | === 5:00 === | ||
* '''Powerups''' | * '''[[Powerups]]''' | ||
** '''Spawn and Respawn:''' Every 5 minutes thereafter. | ** '''Spawn and Respawn:''' Every 5 minutes thereafter. | ||
*** '''Example:''' If picked up at 14:55, a new powerup will appear at 15:00. | *** '''Example:''' If picked up at 14:55, a new powerup will appear at 15:00. | ||
*** '''Note:''' Powerups spawn at both locations simultaneously, and their status can be checked via the mini-map icon. | *** '''Note:''' Powerups spawn at both locations simultaneously, and their status can be checked via the mini-map icon. | ||
* '''Medium [[Neutral]] Camps''' | |||
** '''Respawn Time:''' {{#expr:floor({{NpcData|neutral_trooper_normal|SpawnInterval}}/60)}}:{{#ifexpr:({{NpcData|neutral_trooper_normal|SpawnInterval}} mod 60) < 10|0}}{{#expr:{{NpcData|neutral_trooper_normal|SpawnInterval}} mod 60}} minutes after all Neutrals in camp are defeated. | |||
* '''Medium [[ | |||
** '''Respawn Time:''' {{#expr:floor({{NpcData|neutral_trooper_normal|SpawnInterval}}/60)}}:{{#ifexpr:({{NpcData|neutral_trooper_normal|SpawnInterval}} mod 60) < 10|0}}{{#expr:{{NpcData|neutral_trooper_normal|SpawnInterval}} mod 60}} minutes after all | |||
** '''Count:''' 22 | ** '''Count:''' 22 | ||
[[File:Midtown8min.png|alt=Image of the Deadlock minimap as it appears at 8:00 with no units on it. Has the icons for 6 small camps, 26 medium camps, 8 hard camps, and 2 vault camps added on top of the initial map state.|thumb|240x240px|The map at 8 minutes.]] | [[File:Midtown8min.png|alt=Image of the Deadlock minimap as it appears at 8:00 with no units on it. Has the icons for 6 small camps, 26 medium camps, 8 hard camps, and 2 vault camps added on top of the initial map state.|thumb|240x240px|The map at 8 minutes.]] | ||
| Line 166: | Line 180: | ||
=== 8:00 === | === 8:00 === | ||
* '''Hard [[ | * '''Hard [[Neutral]] Camps''' | ||
** '''Respawn Time:''' {{#expr:floor({{NpcData|neutral_trooper_strong|SpawnInterval}}/60)}}:{{#ifexpr:({{NpcData|neutral_trooper_strong|SpawnInterval}} mod 60) < 10|0}}{{#expr:{{NpcData|neutral_trooper_strong|SpawnInterval}} mod 60}} minutes after all | ** '''Respawn Time:''' {{#expr:floor({{NpcData|neutral_trooper_strong|SpawnInterval}}/60)}}:{{#ifexpr:({{NpcData|neutral_trooper_strong|SpawnInterval}} mod 60) < 10|0}}{{#expr:{{NpcData|neutral_trooper_strong|SpawnInterval}} mod 60}} minutes after all Neutrals in camp are defeated. | ||
** '''Count:''' 12 | ** '''Count:''' 12 | ||
* '''Vault Camp''' ([[Sinner's Sacrifice]] machines) | * '''Vault Camp''' ([[Sinner's Sacrifice]] machines) | ||
** '''Machine Effect:''' Has 500 health and can only be damaged with melee attacks. Weak melee attacks will do 50 point of damage and strong melee attacks will do 100 (Weak melee will do 100 damage for last hit). Each hit will deal {{NpcData|neutral_sinners_sacrifice|RetaliateDamage}} points of damage to the attacker, but grant some amount of Souls. Once the machine takes 400 damage, a looping timing window starts where a well timed | ** '''Machine Effect:''' Has 500 health and can only be damaged with melee attacks. Weak melee attacks will do 50 point of damage and strong melee attacks will do 100 (Weak melee will do 100 damage for last hit). Each hit will deal {{NpcData|neutral_sinners_sacrifice|RetaliateDamage}} points of damage to the attacker, but grant some amount of Souls. Once the machine takes 400 damage, a looping timing window starts where a well timed melee attack will dispense one or more Golden Statue buffs. It will dispense one buff if killed with a light melee attack. | ||
** '''Respawn Time:''' {{#expr:{{NpcData|neutral_sinners_sacrifice|SpawnInterval}}/60}} minutes after being defeated. | ** '''Respawn Time:''' {{#expr:{{NpcData|neutral_sinners_sacrifice|SpawnInterval}}/60}} minutes after being defeated. | ||
** '''Count:''' 10 locations (some locations have 2 machines). | ** '''Count:''' 10 locations (some locations have 2 machines). | ||
=== 10:00 === | |||
* '''[[Powerups]]''' | |||
* '''[[Soul Urn]]''' | |||
* '''Soul Urn''' | ** '''Descent:''' Begins at 10:00 lands after 12 seconds. | ||
** '''Descent:''' Begins at 10:00 | |||
** '''Respawn Time:''' Every 5 minutes after 10:00. | ** '''Respawn Time:''' Every 5 minutes after 10:00. | ||
* ''' | * '''[[Unstable Rift]]''' | ||
** ''' | ** '''Spawn:''' First Rift spawns at 11:00 ± 1 minute thus making 10:00 the earliest possible time for Rift to spawn | ||
** ''' | ** '''Mechanics:''': Spawn as visual indicator => 40s pass => Global announcement => 20s pass => Rift contest begins. | ||
** '''Respawn Time:''' Every 7 ± 1 minutes after the previous Rift. | |||
** '''Respawn Time:''' 7 | |||
*'''Golden Statues Upgraded (Tier 2)''' | *'''Golden Statues Upgraded (Tier 2)''' | ||
**'''Buffs Granted:''' | **'''Buffs Granted:''' | ||
*** +2% Fire Rate | *** +2% Fire Rate | ||
*** +5% Ammo Capacity | *** +5% Ammo Capacity | ||
*** + | *** +0.75% Cooldown Reduction | ||
*** +4% Weapon Damage | *** +4% Weapon Damage | ||
*** + | *** +20 Health | ||
*** +3 Spirit | *** +3 Spirit | ||
* '''Mid Crates and Golden Statues''' (in the room above Mid-Boss) | |||
[[File:Midtown10min.png|alt=Image of the Deadlock minimap as it appears at 12:00 with no units on it. Has the icons for 6 small camps, 26 medium camps, 8 hard camps, 2 vault camps, the Soul Urn and 2 Runes added on top of the initial map state.|thumb|240x240px|The map at 12 minutes.]] | |||
=== 12:00 === | |||
* '''[[Guardians]]''' lose their last damage resistance and at -50% become as vulnerable as they can be. | |||
=== 18:00 === | |||
* '''[[Walkers]]''' lose their last damage resistance and at -65% become as vulnerable as they can be. | |||
=== 20:00 === | |||
* '''[[Troopers]]''' start spawning more frequently, from every 30s to every 25s. | |||
=== 30:00 === | === 30:00 === | ||
* '''Golden Statues Upgraded (Tier 3)''' | * '''Golden Statues Upgraded (Tier 3)''' | ||
** '''Buffs Granted:''' | ** '''Buffs Granted:''' | ||
*** +2.5% Fire Rate | *** +2.5% Fire Rate | ||
*** +7% Ammo Capacity | *** +7% Ammo Capacity | ||
*** +1 | *** +1% Cooldown Reduction | ||
*** +6% Weapon Damage | *** +6% Weapon Damage | ||
*** + | *** +30 Health | ||
*** +4 Spirit | *** +4 Spirit | ||
=== 35:00 === | |||
* '''[[Troopers]]''' start spawning more frequently, from every 25s to every 20s. | |||
** They also get +50% max HP. | |||
== Territory == | == Territory == | ||
| Line 219: | Line 245: | ||
== Trivia == | == Trivia == | ||
* Before the [[Update:February 25, 2025| | * Before the [[Update:February 25, 2025|Map Rework]] Update, the map had 4 lanes. The fourth was Purple (Park). Green Lane was initially called Greenwich, then replaced Park, and is now Greenwich again, though still labeled as Park in the Zipline UI. The center of the map was the Museum, now reworked as the Archmother base. | ||
* Green (Greenwich) originally supplanted Orange (Orchard). | |||
* Green (Greenwich) originally supplanted Orange (Orchard) | |||
* All the lanes are named after real New York streets. The team's bases used to be named after the train stations Grand Central (Archmother) and Penn Station (Hidden King). | * All the lanes are named after real New York streets. The team's bases used to be named after the train stations Grand Central (Archmother) and Penn Station (Hidden King). | ||
* Towards the right of the team's bases is a Bull and a Bear Statue, respectively located at the Museum (Archmother) and the Factory (Hidden King). These statues are symbolic to the [https://www.wikipedia.org/wiki/Market_trend market conditions] of a stock market. On a related note, the [https://www.wikipedia.org/wiki/Charging_Bull Bull Statue] has a real world counterpart in New York. | * Towards the right of the team's bases is a Bull and a Bear Statue, respectively located at the Museum (Archmother) and the Factory (Hidden King). These statues are symbolic to the [https://www.wikipedia.org/wiki/Market_trend market conditions] of a stock market. On a related note, the [https://www.wikipedia.org/wiki/Charging_Bull Bull Statue] has a real world counterpart in New York. | ||
* The [[wikipedia:Statue_of_Liberty|Statue of Liberty]] can be seen behind the dock on Yellow Lane. | * The [[wikipedia:Statue_of_Liberty|Statue of Liberty]] can be seen behind the dock on Yellow Lane. | ||
* The map used to be called ''street_test'', and was later changed to ''dl_streets'' in one of the updates, until it was replaced by ''dl_midtown''. ''street_test'' and ''dl_streets'' can still be accessed in-game with the [[Console commands|console command]] <code>map street_test</code> and <code>map dl_streets</code>, although the former's lighting was broken by updates. | * The map used to be called ''street_test'', and was later changed to ''dl_streets'' in one of the updates, until it was replaced by ''dl_midtown''. ''street_test'' and ''dl_streets'' can still be accessed in-game with the [[Console commands|console command]] <code>map street_test</code> and <code>map dl_streets</code>, although the former's lighting was broken by updates. | ||
* There used to be a map in the files called ''caldera_trooper,'' which featured assets from both [[Neon Prime|''Neon Prime'']] and early ''Deadlock'' builds. It has since been removed, but was archived by modders. A tour and comparison of ''caldera_trooper'' was made by YouTube channel [https://www.youtube.com/watch?v=9NI_-X37Y2A DeadAir]. | * There used to be a map in the files called ''caldera_trooper,'' which featured assets from both [[Neon Prime|''Neon Prime'']] and early ''Deadlock'' builds. It has since been removed, but was archived by modders. A tour and comparison of ''caldera_trooper'' was made by YouTube channel [https://www.youtube.com/watch?v=9NI_-X37Y2A DeadAir]. Left side of the Sandbox map was based off it. | ||
* Other unused maps currently accessible in the game files that use ''Neon Prime'' assets are called ''start'', ''1v1_test'' and ''hero_testing''. | * Other unused maps currently accessible in the game files that use ''Neon Prime'' assets are called ''start'', ''1v1_test'' and ''hero_testing''. | ||
* Many of the buildings in the Cursed Apple's skyline are based on real New York buildings from the early 1900s.<ref>[https://steamcommunity.com/sharedfiles/filedetails/?id=3378301007 ''Real New York buildings in Deadlock, explained.''] on Deadlock Steam Community</ref> | * Many of the buildings in the Cursed Apple's skyline are based on real New York buildings from the early 1900s.<ref>[https://steamcommunity.com/sharedfiles/filedetails/?id=3378301007 ''Real New York buildings in Deadlock, explained.''] on Deadlock Steam Community</ref> | ||
| Line 245: | Line 270: | ||
File:Billboards green lane.png|66th Store building (dl_streets) | File:Billboards green lane.png|66th Store building (dl_streets) | ||
File:Old map eclipse.jpg|dl_streets with old eclipse skybox | File:Old map eclipse.jpg|dl_streets with old eclipse skybox | ||
File: | File:Neon Prime map concept.png|''Neon Prime'' concept art | ||
File:Neon Prime screenshot 3.jpg|Purple lane in ''Neon Prime'' | |||
</gallery> | </gallery> | ||
| Line 254: | Line 280: | ||
== References == | == References == | ||
<references /> | <references /> | ||
== Navigation == | |||
{{Navbox gameplay}}{{Lore Navbox}} | {{Navbox gameplay}}{{Lore Navbox}} | ||
[[Category:Lore]] | [[Category:Lore]] | ||
[[Category:Gameplay]] | [[Category:Gameplay]] | ||
[[Category:Locations]] | |||
Latest revision as of 23:19, 11 August 2026
“Welcome to New York! Need a gun?— The Shopkeeper

The Cursed Apple or "The Map" is the default location where matches take place in Deadlock. It is a small segment of the game's version of Midtown and Lower Manhattan in New York City, in which the Heroes fight to complete The Ritual and summon their respective Patron. Players can navigate with a Minimap.
The current map is called dl_midtown. Previous versions of the map were called street_test and dl_streets.
Overview
[edit | edit source]
Layout
[edit | edit source]The map is divided into three distinct lanes: York (Yellow Lane), Broadway (Blue Lane) and Park (Green Lane), also referred to as Greenwich. Outside of these lanes are a series of tunnels, alleyways, and buildings that sometimes contain Golden Statues, crates, and Neutrals. In each lane, a Zipline extends from both bases directly overhead with each having the color of the corresponding lane. The Hidden King's side of the map has mostly worn down red brick buildings, while the Archmother's side has mostly upper class white brick buildings.
Throughout the map, players can find destructible Boxes and Golden Statues. Boxes have a 60% chance to drop souls upon being destroyed, and Golden Statues have a 50% chance to drop permanent stat bonuses, such as Spirit Power or Weapon Damage. They spawn 3 minutes into the game (except mid-boxes, see Map Timings and Events : 10min) and will respawn 3 minutes after being destroyed.
Outside of the lanes is an area of the map called the jungle, which is home to the Neutral camps. Neutrals are alien-like entities that appear in groups and will attack when provoked. They come in three different sizes: small, medium and large, and drop more souls the larger they are. Being neutral units, both teams can attack the same neutral camps, and they will be aggressive to their attackers no matter which team they are on.
Respawn Room
[edit | edit source]At the rear of each team's base sits the Respawn Room, where heroes respawn after being killed. It also houses the team's Curiosity Shop and a Soul Well, which activates 3 minutes into the match. While inside the room, allied heroes restore 6% of their maximum health plus 60 health each second. Enemy heroes who enter are targeted by four turrets positioned around the room.
Juke Rooms
[edit | edit source]Juke Rooms are small dead-end tunnels located in specific points around the map. They are marked prominently by their shadowy figure standing in their doorways that contains a cosmic veil. Above the doorways is a red rectangular sign, and in the compartment contains candles and a small wall light. Juke Rooms - as implied by their name - are most often used to hide or corner enemies, as they have only one entrance. The doorway shadow also acts as a warning for fleeing players that they are about to walk into a dead-end.

Objectives
[edit | edit source]In each lane on either team's side, there are a series of powerful defensive structures that must be destroyed in order to reach the enemy base. The first is the Guardian, followed by the Walker and finally a pair of weaker Base Guardians. In each team's base are two Shrines, which must be destroyed in order to attack the main objective: the Patron. The Patron has two phases, and will shift to the second one after the first phase has been defeated. Destroying the now weakened Patron is the condition for winning a match.
When an objective is destroyed, the bounty is split between the player who landed the killing blow and nearby allies. 30% of the bounty is split among nearby heroes, while the remaining 70% is distributed team-wide.
In the very middle of the map, in the underground sewer, is a second major objective known as the Mid-Boss. It is a large alien creature similar to the Neutrals, possessing a very large health pool, a constantly regenerating shield and a highly dangerous laser beam. After being slain, it will spawn a Rejuvenator Crystal that can be claimed by either team. The claimer's team will be bestowed with the Rejuvenation Credit buff, granting them special effects.
Player Visibility
[edit | edit source]- Main article: Minimap
An important aspect of the map is spotting where enemies are located. An enemy player is visible to the team if they are either in a team player's line of sight, or shooting Troopers or Structures. A player can press Tab and middle-click the enemies' portrait to ping to their allies that said enemy is missing, which is useful if they have left their lane.
Map Icons
[edit | edit source]Special locations on the map can be identified by the following icons:
| Icon | Location | Spawn Time | Respawn Time | Count |
|---|---|---|---|---|
 |
Shop | - | - | 10
|
 |
Teleporter | - | - | 4 |
 |
Stairs | - | - | 6 |
 |
Mid Stairs | - | - | 2 |
 |
Soul Urn | 10 minutes
(12.5s descent) |
Every 5:00 (10, 15, 20...) | 1 |
 
|
Powerup | 5 minutes | Every 5:00 (5, 10, 15...) | 2 |
| Respawn Time begins when Camp/Boss is cleared: | ||||
 |
Mid-Boss | - | 7/6/5 minutes* | 1 |
 |
Easy Camp | 2:00 minutes | 1:25 minutes | 4 |
 |
Medium Camp | 5:00 minutes | 4:50 minutes | 22 |
 |
Hard Camp | 8:00 minutes | 5:35 minutes | 12 |
 |
Vault Camp | 8 minutes | 5 minutes | 12 (in 10 locations) |


* Mid-Boss respawn time decreases after each death, with a minimum time of 5 minutes.
Map Timings and Events
[edit | edit source]0:00
[edit | edit source]- Mid-Boss
- Buff Granted: 3 Rejuvenator credits for the team (1 per heavy melee). Heals the player who punches the first time to 100% health.
- Effect: Resurrects a player who dies after 3s, consuming 1 credit.
- Respawn Time: 7/6/5 minutes* after being defeated, decreasing with each respawn.


2:00
[edit | edit source]- Easy Neutral camps
- Respawn Time: 1:25 minutes after all Neutrals in camp are defeated.
- Count: 4
3:00
[edit | edit source]- Soul Well
- Soul Wells located in the respawn room for each team start emitting souls.
- Crates
- Respawn Time: 3 minutes after being broken.
- Drops: Unsecured Souls (50-100 Souls on average, scales with game time).
- Usage:
- Unsecured Souls may be spent in the shop, but are spent after Secured Souls.
- If the player dies with Unsecured Souls, they appear on the ground where they died. Picking up the Souls grants the Unsecured Souls.
- Neutrals also drop Unsecured Souls.
- Golden Statues (Tier 1)
- Respawn Time: 3 minutes after being broken.
- Buffs Granted:
- +1.5% Fire Rate
- +3% Ammo Capacity
- +0.5% Cooldown Reduction
- +3% Weapon Damage
- +15 Health
- +2 Spirit
- Note: The boxes and statues in the room above Mid-Boss only spawn at 10:00.

5:00
[edit | edit source]- Powerups
- Spawn and Respawn: Every 5 minutes thereafter.
- Example: If picked up at 14:55, a new powerup will appear at 15:00.
- Note: Powerups spawn at both locations simultaneously, and their status can be checked via the mini-map icon.
- Spawn and Respawn: Every 5 minutes thereafter.
- Medium Neutral Camps
- Respawn Time: 4:50 minutes after all Neutrals in camp are defeated.
- Count: 22

8:00
[edit | edit source]- Hard Neutral Camps
- Respawn Time: 5:35 minutes after all Neutrals in camp are defeated.
- Count: 12
- Vault Camp (Sinner's Sacrifice machines)
- Machine Effect: Has 500 health and can only be damaged with melee attacks. Weak melee attacks will do 50 point of damage and strong melee attacks will do 100 (Weak melee will do 100 damage for last hit). Each hit will deal 80 points of damage to the attacker, but grant some amount of Souls. Once the machine takes 400 damage, a looping timing window starts where a well timed melee attack will dispense one or more Golden Statue buffs. It will dispense one buff if killed with a light melee attack.
- Respawn Time: 5 minutes after being defeated.
- Count: 10 locations (some locations have 2 machines).
10:00
[edit | edit source]- Soul Urn
- Descent: Begins at 10:00 lands after 12 seconds.
- Respawn Time: Every 5 minutes after 10:00.
- Unstable Rift
- Spawn: First Rift spawns at 11:00 ± 1 minute thus making 10:00 the earliest possible time for Rift to spawn
- Mechanics:: Spawn as visual indicator => 40s pass => Global announcement => 20s pass => Rift contest begins.
- Respawn Time: Every 7 ± 1 minutes after the previous Rift.
- Golden Statues Upgraded (Tier 2)
- Buffs Granted:
- +2% Fire Rate
- +5% Ammo Capacity
- +0.75% Cooldown Reduction
- +4% Weapon Damage
- +20 Health
- +3 Spirit
- Buffs Granted:
- Mid Crates and Golden Statues (in the room above Mid-Boss)

12:00
[edit | edit source]- Guardians lose their last damage resistance and at -50% become as vulnerable as they can be.
18:00
[edit | edit source]- Walkers lose their last damage resistance and at -65% become as vulnerable as they can be.
20:00
[edit | edit source]- Troopers start spawning more frequently, from every 30s to every 25s.
30:00
[edit | edit source]- Golden Statues Upgraded (Tier 3)
- Buffs Granted:
- +2.5% Fire Rate
- +7% Ammo Capacity
- +1% Cooldown Reduction
- +6% Weapon Damage
- +30 Health
- +4 Spirit
- Buffs Granted:
35:00
[edit | edit source]- Troopers start spawning more frequently, from every 25s to every 20s.
- They also get +50% max HP.
Territory
[edit | edit source]An important part of Deadlock is managing the clash of Troopers that occurs in each lane. Killing enemy Troopers allows allied Troopers to move further into the lane. This extends the Zipline available to the player's team on that lane. The Ziplines on the map will show how far a lane is "pushed" towards the enemy base, how far the Zipline can take the player, and if any lanes are in need of help with a quick glance. Teleporters can be used to quickly traverse the map horizontally.
Trivia
[edit | edit source]- Before the Map Rework Update, the map had 4 lanes. The fourth was Purple (Park). Green Lane was initially called Greenwich, then replaced Park, and is now Greenwich again, though still labeled as Park in the Zipline UI. The center of the map was the Museum, now reworked as the Archmother base.
- Green (Greenwich) originally supplanted Orange (Orchard).
- All the lanes are named after real New York streets. The team's bases used to be named after the train stations Grand Central (Archmother) and Penn Station (Hidden King).
- Towards the right of the team's bases is a Bull and a Bear Statue, respectively located at the Museum (Archmother) and the Factory (Hidden King). These statues are symbolic to the market conditions of a stock market. On a related note, the Bull Statue has a real world counterpart in New York.
- The Statue of Liberty can be seen behind the dock on Yellow Lane.
- The map used to be called street_test, and was later changed to dl_streets in one of the updates, until it was replaced by dl_midtown. street_test and dl_streets can still be accessed in-game with the console command
map street_testandmap dl_streets, although the former's lighting was broken by updates. - There used to be a map in the files called caldera_trooper, which featured assets from both Neon Prime and early Deadlock builds. It has since been removed, but was archived by modders. A tour and comparison of caldera_trooper was made by YouTube channel DeadAir. Left side of the Sandbox map was based off it.
- Other unused maps currently accessible in the game files that use Neon Prime assets are called start, 1v1_test and hero_testing.
- Many of the buildings in the Cursed Apple's skyline are based on real New York buildings from the early 1900s.[1]
- The Juke Room shadows are actually 3D models rendered with transparency. There are 4 models: A tall man wearing a fedora, a short man wearing a postman hat, a woman, and a child holding a box.
Gallery
[edit | edit source]-
 Title screen
 -
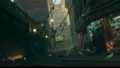 Old main menu screen
 -
 3 lane update art
 -
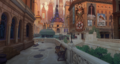 Concept art
 -
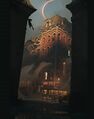 Concept art
 -
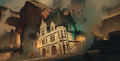 Concept art
 -
 Concept art
 -
 Concept art
 -
 4 lane minimap (dl_streets)
 -
 Old 4 lane minimap (dl_streets) with orange lane
 -
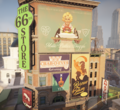 66th Store building (dl_streets)
 -
 dl_streets with old eclipse skybox
 -
 Neon Prime concept art
 -
 Purple lane in Neon Prime


See also
[edit | edit source]References
[edit | edit source]- ↑ Real New York buildings in Deadlock, explained. on Deadlock Steam Community
Navigation
[edit | edit source]
| ||||||||||||||
| ||||||||||||||||||||


